Game > Smart Downloader > User Guide for Unity Tool
Getting Started
Smart Downloader Unity Tool (SUT) is a tool to upload and deploy resources for Unity.
Environments
Supported Unity Versions
- 2018.4.0 - 2021.1.20
Download
Install Unity Tool
- Open a Unity project.
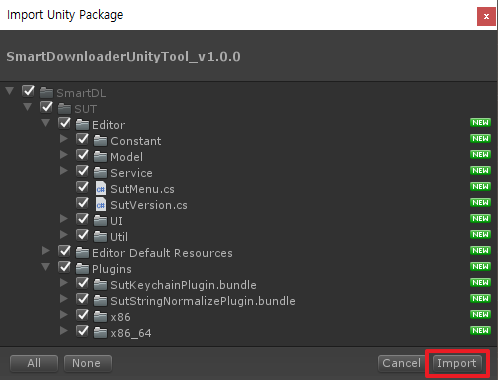
- In Unity, select Assets > Import Package > Custom Package.
- Select and import 'Smart-downloader-unity-tool-{Version}.unitypackage', which is a downloaded Unity Tool file.
Enabling Unity Tool
To enable Unity Tool, select Tool > NHN Cloud > Smart Downloader > Unity Tool in the menu.
Authenticate
If the authentication has not been performed, the Authentication tab appears.
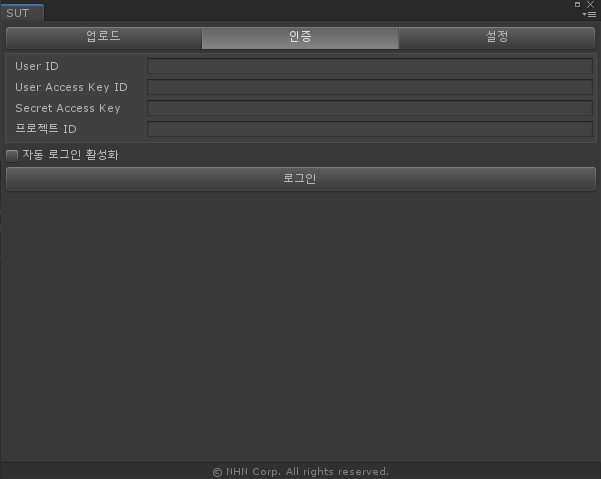
- User ID: NHN Cloud ID
-
User Access Key ID, Secret Access Key
- In API Security Setting, select Create User Access Key ID.
- When the dialog box appears, choose Create User Access Key ID and Secret Access Key.
- The dialog box indicating the completion of Secret Access Key issuance appears.
- Check the issued User Access Key ID information and status information on the API Security Setting page.
[Caution] - It is recommended to change the User Access Key ID every 90 days. - You can create up to 5 User Access Key IDs per NHN Cloud ID and 5 per IAM ID. - The Secret Access Key cannot be verified again and must be reissued if lost. After creating the key, store the created key securely.
-
Project ID
- A project ID using Smart Downloader, which can be found from Project Setting on the console.
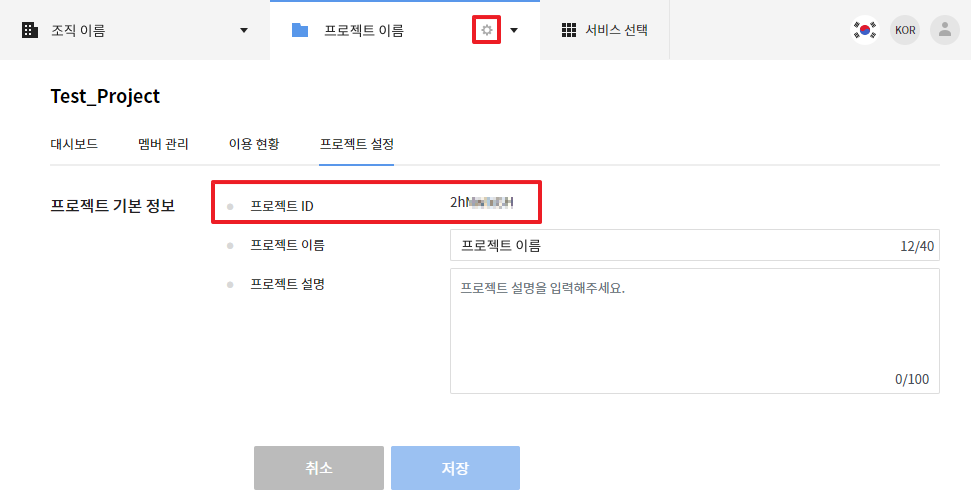
- A project ID using Smart Downloader, which can be found from Project Setting on the console.
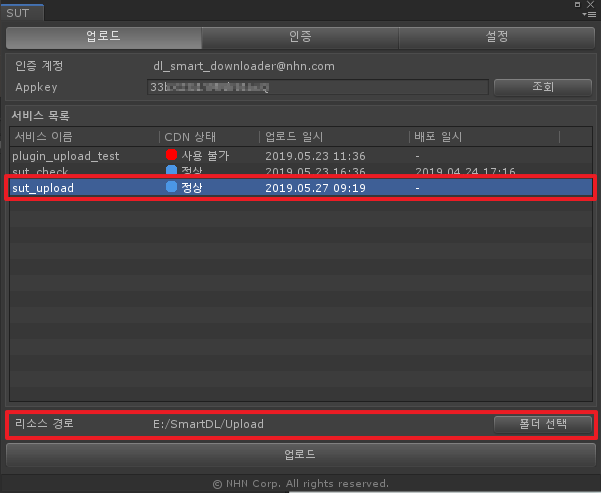
Query Services
When the authentication is complete, the Upload tab appears. Enter the appkey in Appkey and click Query, and the list of services created on the console is displayed.
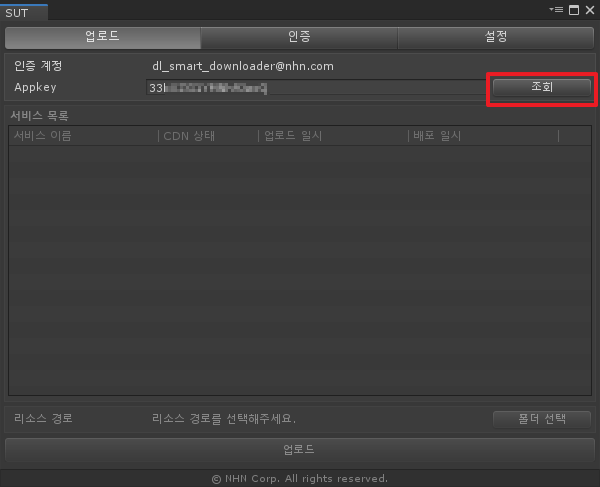
- Appkey
- Click URL & Appkey from Smart Downloader of the console and check the issued appkey.
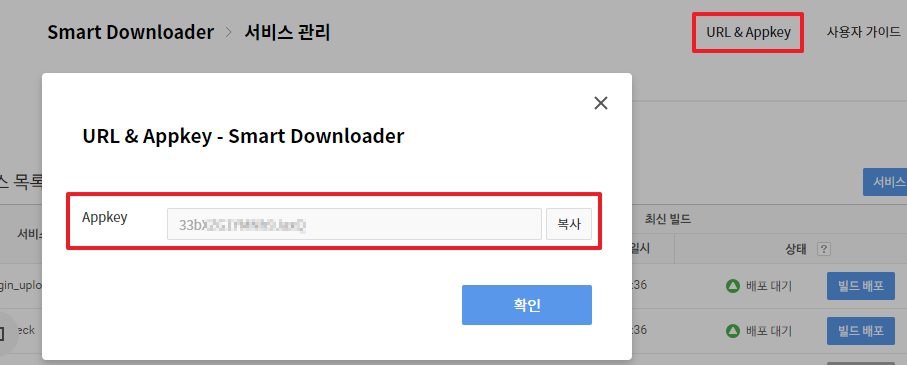
- Click URL & Appkey from Smart Downloader of the console and check the issued appkey.
Uploading Resources
1. Select Services
Click a service to upload from the service list and select resource path. If the path is correct, the Upload button will be activated.
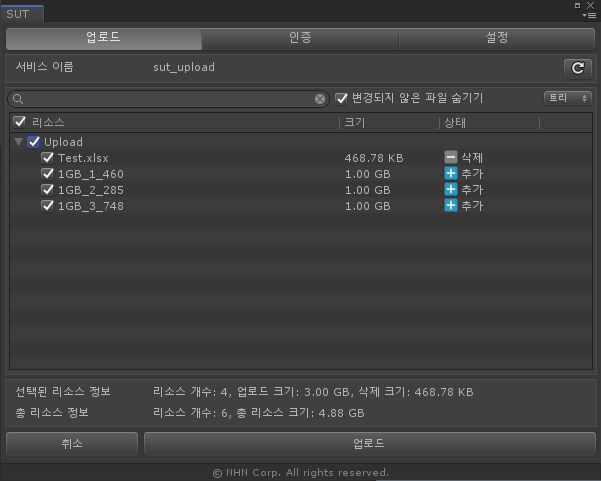
2. Select Upload Resources
Compares resources of the selected path with those of the last uploaded, and shows changes. Select resources to upload, and the Upload button will be activated.
Caution Files that are automatically created from OS (.DS_Store, desktop.ini, thumbs.db) are excluded. Each resource cannot be larger than 5GB.
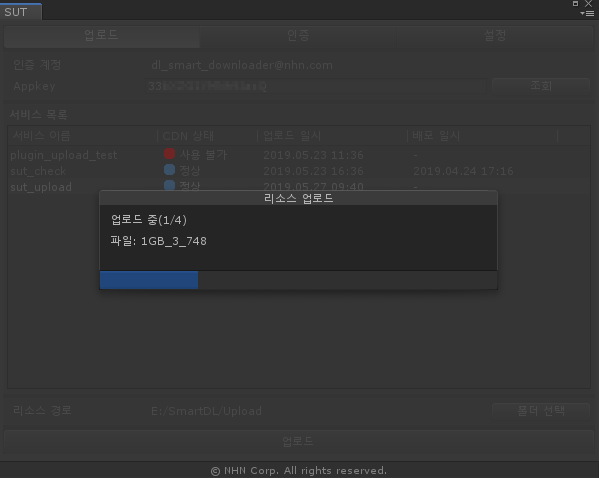
3. Upload Resources
Shows uploading progress. If tool is closed while uploading is underway, a window pops up asking whether to cancel uploading or not.
Caution Do not force close unity while uploading is underway. If it is forced to close, the status remains to be uploading, and will be changed to failure in 30 minutes.
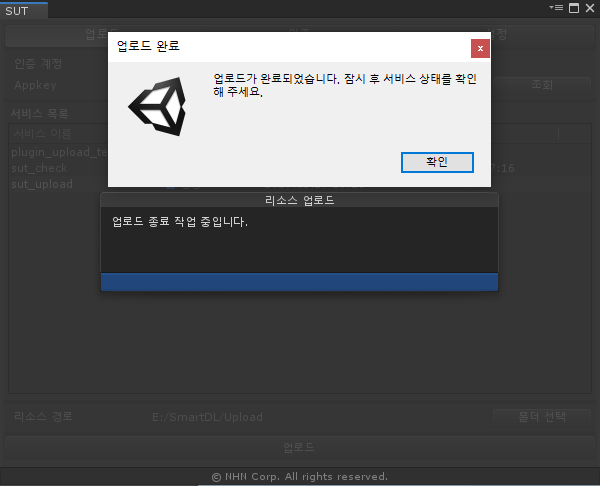
4. Complete
When it is normally completed, a windows pops up to confirm.
Service Details
Select service from the list and double-click to show Service Details.
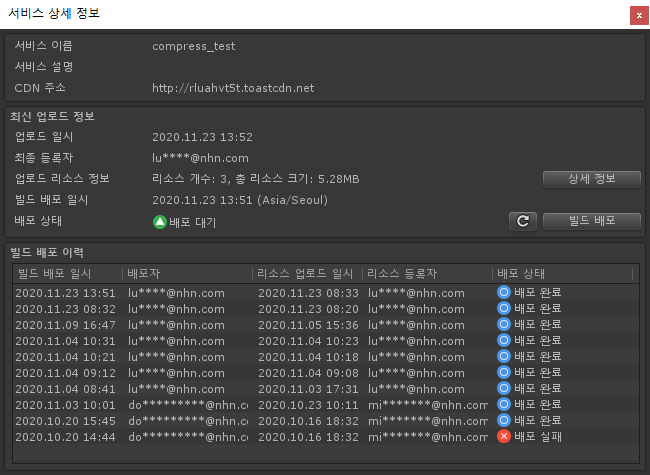
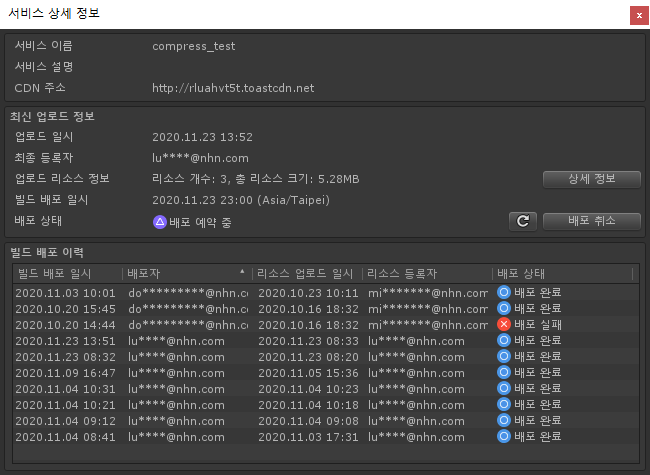
- Service Information
- Service Name: Name of service entered for service registration.
- Service Description: Description of registered service.
- CDN Address: Address with which CDN is completely integrated.
- Most Recent Uploads
- Date and Time: The last upload time and date of resources.
- Last Registrant: User ID uploading resources.
- Upload Resource Information: Number and total size of uploaded resources.
- Detail Information: Uploaded resource information.
- Build deployment date: The date of the last build deployment, or the date of the scheduled deployment if the deployment status is Deployment scheduled.
- Deployment Status: Check status of deployment. See Console User Guide for deployment status.
- Updates: Upload service details.
- Build Deployment: To be activated when build is ready to be deployed, with the latest build deployed by CDN.
- Build Deployment History: Shows the history of the most recent 10 build deployment cases.
Build Deployment
Only when the deployment status is Ready for Deployment, or Deployment Failed, the most updated upload resources can be deployed to CDN.
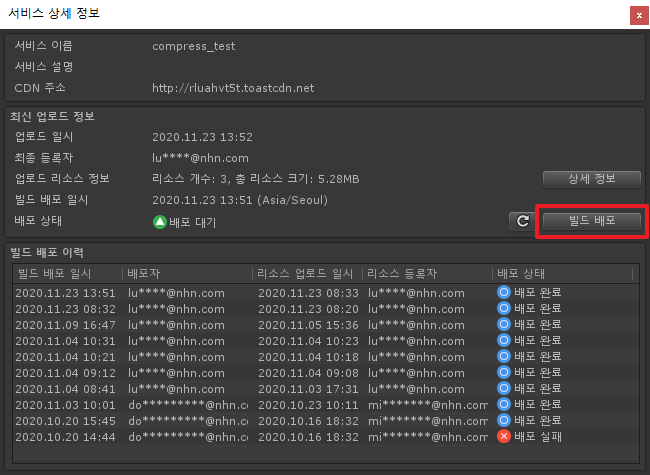
If you click the Deploy Build button, the following pop-up window will show up.
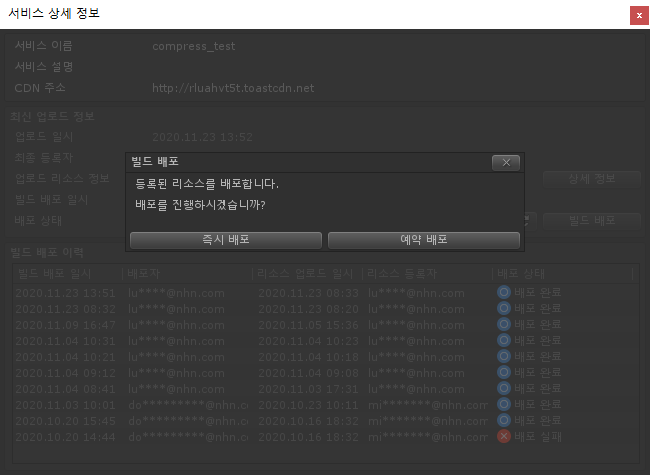
- Immediate deployment: Attempt deployment immediately.
- Scheduled deployment: Attempt deployment at the time specified by user.
Scheduled deployment
If you select Scheduled deployment, and the following screen will show up.
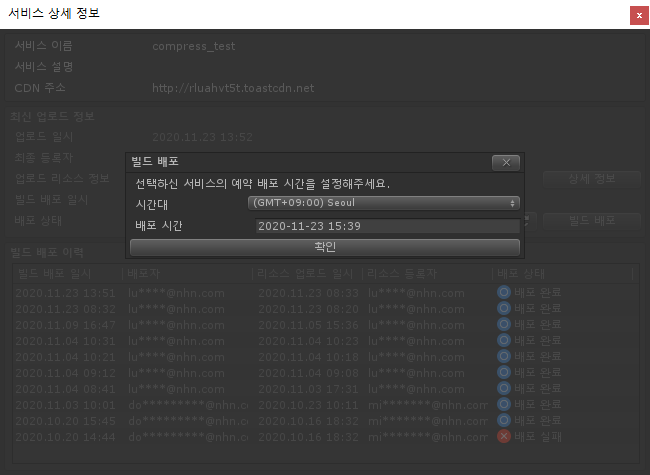
- Time zone: Specify the base time zone for deployment.
- Deployment time: Specify the time to deployment.
If the scheduled deployment time is set to a time before the time of the specified time zone, the deployment is executed immediately, and uploading is restricted until the time set for the scheduled deployment.
If you specify a scheduled deployment time that is before the current time in the specified time zone, deployment is performed immediately. Uploading is limited until the time set for the scheduled deployment. Once deployment scheduling is completed, the deployment status changes to Scheduled and you can check that the build deployment date/time is changed to the scheduled time. When the status is Deployment scheduled, you can cancel the schedule by clicking the Cancel deployment on the right.
Settings
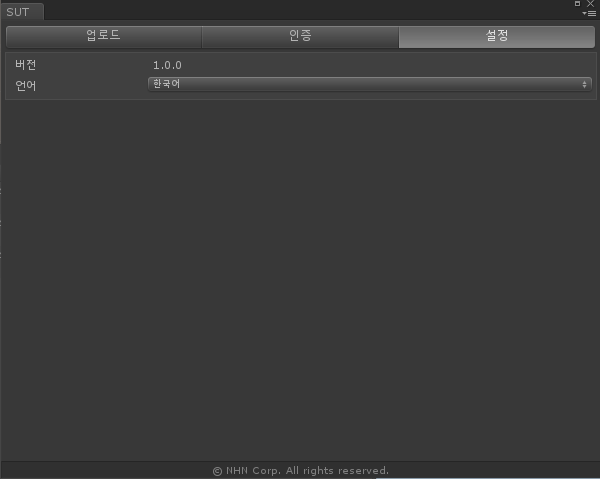
- Version information: Shows the version information of Unity Tool.
- Change the language: Change the language for the tool: Korean, English, and Japanese are supported.